Over at AWC you can find a neat board called a GPMPU40 that allows you to work with just about any DIP CPU ranging from tiny 8 pin CPUs to big 40 pin CPUs (yes, I know the title is about working with surface mount -- I'm getting there).
The board has two patterns of holes -- one for .3 inch chips and one for .6 inch chips. In addition there is a place for a regulated power supply, a ceramic resonator or crystal, a reset circuit and switch (active or passive reset), and the ubiquitous RS232 port with a MAX232. There's also a 40 pin header that brings each pin out to the board edge for interconnect. If you install an upside down header there, you can plug the whole board into a solderless breadboard.
Each section of the board has holes so you connect the sections as you see fit. So if your processor has power on pin 1 and ground on pins 8, 9, and 22, that's how you wire it up. If you put headers everywhere, you can use jumpers to make the connections quickly and non-permanently. If you aren't using a 40 pin chip, you can use the leftover space for a EEPROM or a serial A/D or any other small support chip you might need.
I've used these boards to wire up just about every Microchip PIC you can imagine, 8051 chips from Maxim and Dallas, Zilog Z8s, Ubicom/Scenix/Parallax SX chips, Basic Stamps, Motorola chips, Atmel ATMega chips -- and many more. But lately, more of the interesting CPUs are in surface mount packaging.
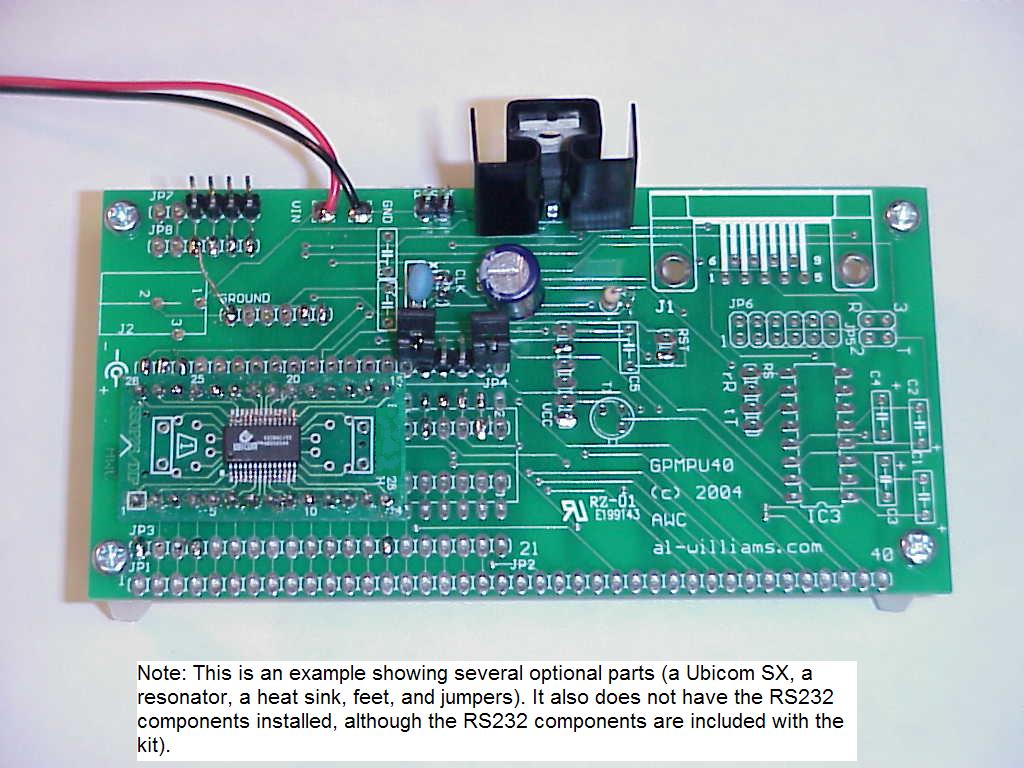
The picture above shows the board which is now available with a 28 pin SSOP footprint (the processor is a 50MIPs Ubicom SX). You still have enough room for an 8 pin DIP underneath, although in the picture I used the extra space for jumpers to select an internal clock (the blue resonator) or an external one from an SX-Key (connected to the 4 pins in the top left corner). I didn't install the RS232 components, although they are part of the kit.
If you are wanting to work with surface mount, this is a good way to dip your toe in the water. Even with a regular soldering iron you shouldn't have any trouble with a 28 pin SSOP. You just need a fine tip (I like to use a screwdriver tip on its side) and fine solder or blob solder all along the edge and wick up the excess (use plenty of liquid flux like that from a flux pen). If you use the blob method, you can use an embarrassingly large iron and thick solder!
Of course, there are other ways to solder surface mount. Hot air and paste is good for doing lots of parts at once -- especially ceramic capacitors where sudden heating might crack the component. But for 28 IC pins, I'd just stick with a good old fashioned contact iron and fine solder. If you want to practice get an old board (like a PC network card) that you don't care about anymore. You want a good source of heat like a pencil torch or an embossing gun (get these at a hobby store like Hobby Lobby for less than $20). Heat up the area around a chip until the solder starts to melt and then with tweezers just lift the chip. This is a throwaway, so you don't really care if you damage the chip or not (although with practice you can use either of these tools to do this reliably). Now with a regular iron, flux, and either a wick or a "solder sucker" clean up the pads and IC pins. Now practice putting the chip back where it went. Kind of like being in the Army and digging a hole and then filling it back in! But practice makes perfect.
So don't be afraid of surface mount. You can find the board at the bottom of this page (which mostly talks about the DIP version).
Labels: electronics, microcontroller, smd
Submit to:
 Del.icio.us |
 Digg |
Slashdot |
 Diigo
Diigo
posted by Al @ 10:29 AM
0 comments
![]()
![]()


0 Comments:
Post a Comment
<< Home